jeff's blog
Sunday, April 08, 2007
Friday, May 12, 2006
Thursday, May 11, 2006
Wednesday, May 10, 2006
Wednesday, April 05, 2006
Wednesday, February 08, 2006
Activity Three
It is time to learn about planar distortion. This activity sequence is all about taking a flat object and forming it into a 3-Dimensional object.
TASK
You will need to create 12 different 3-D planar distortions with index cards.
MATERIALS
- pack of 3x5 index cards
- half sheet of cardboard
- glue
- tape
PROCEDURE
- take an index card and change its appearance by slits, notches, scoring, creases, and subtracting
- make the same cuts to another index card and this time warp, twist, pinch, fold, and overlap it
- use glue or tape to make sure the distortion stays together
- make 11 more of these(you should have 24 cards when you are done)
- once you have your 12 distortions, cut a half sheet of cardboard lengthwise and grid out 12 even rectangles(6 on top, 6 on bottom)
- mount your first flat and distorted cards in a block, then keep doing this until you have filled all 12 blocks with
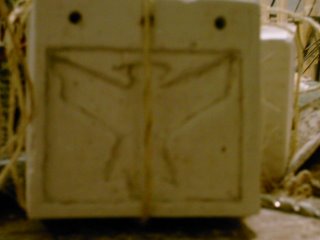
Here is an example of a planar distortion:
Now you can begin the graded experiment.
(If you would like to see more examples of planar distortion go to www.latech.edu/tech/liberal-arts/architecture/Arch120.htm)
GRADED EXPERIMENT
For this experiment, you will be constructing a sunshade and a rigid structural framing system to support it. The sunshade can be a wall, roof, or skylight. It is up to you.
The Site: A sunshade footprint of 12"x24" and a rigid frame suspended or resting between 2"-6" above the cardboard footprint
MATERIALS:
- 3x5 index cards
- steel rods
- floral wire
- skewers
- tape
- glue
- cardboard
PROCEDURE:
- cut out a 12"x24" peice of cardboard for your base
- build a rigid structural framing system
- create a 3-D planar distortion with the index cards(either make the same one over and over or make a few distortions and connect them in a pattern)
- connect the distortions in a pattern to form a sunshade
- connect the sunshade to the frame
Make sure your distortions create a nice shadow when held under a light.
Here are some examples:
EVALUATION: Craftsmanship, function, aesthetics, and invention will determine your grade
To see other examples of this project click here http://www.latech.edu/tech/liberal-arts/architecture/Arch120Manuals.htm
Tuesday, January 31, 2006
Activity Two
Poche', figure/field, and positive/negative space are all terms that you will need to know before starting this project.
- Poche'- the term refers to the "blackening" convention of architectural drawings to signify the thickness of walls in plan
- Figure/field-the pictoral relationship between positive and negative space in an art work
- Positive/negative space- spaces which are occupied by the main subjects of the work / spaces which are the areas around and behind the positive space
You can see more about these definitions and find out about other definitions and see some example photos at www.latech.edu/tech/liberal-arts/architecture/
Now that we know what concepts we are working with, we can begin the experimental activity. Your materials include
- corrugated board
- thin chip board
- bamboo skewers
- steel rods
- floral wire
- string
PROCEDURE:
- cut the cardboard into a 16" by 24" rectangle
- make three sections (A,B,C) by forming another 16" by 24" rectangle, this time with walls and no base (the walls need to be 3" high), and split it into six 8" by 8" squares. then glue it to the cardboard, three squares on it and three squares off.
- using your vocabulary words, shape the container. Here is an example:
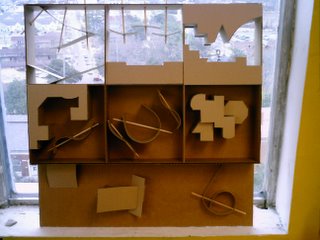
 the scale is 1/4"=1'0 and max wall height is 12' in scale
Finally you are now ready for the graded project. The materials include:
- corrugated cardboard
- wood dowels
- paper
- chip board
PROCEDURE:
Design a cenotaph, a monument erected as a memorial to a dead person buried elsewhere, for Einstein's brain. It should include the following:
- place for the brain to be viewed
- viewing space for no more than six people at a time
- a vault where the brain is stored after hours
- clearly articulated entry (should be a big elaberate enterance)
- a meaningful and spatial path that the viewer walks through
- an exit (should not be a reversal of the entry
- path way in which only an employee can move the brain from its location to the vault
The Site:
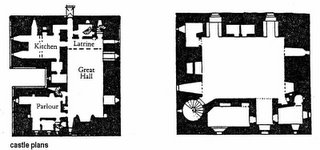
Using the cardboard, cut a 12" by 24" rectangle. Then using the wood dowels, create a frame 12" high and 24" wide like the one seen here:

 You may lay it flat or stand it up, it doesn't matter. The scale is 3/8"=1'0
The objective is to explore the glossary of the architecture terms and spatial ideas and to learn how to "shape the container".
Evaluation:
You will be graded on craftsmanship, function, aesthetics, and invention.
Here are some pictures to help you:
For more examples go to www.latech.edu/tech/liberal-arts/architecture/Arch120Manuals.htm


